Valentine’s Day (non-candy) Treats

As you know, I’m in school these days, so I need to think about Valentine’s Day. My class will be having a party and I wanted to make sure I had Valentines for everyone in my class. Mommy figured there would be lots of candy and other sweet treats, so wanted me to do something that wouldn’t involve an early trip to the dentist. Also, you may remember from this post that some of my classmates have allergies that would make candy-giving more complicated than it needs to be. So, we went with an option that Mommy thinks my teachers, my classmates, and their parents will all like: crayons. Not just plain, old crayons though. Heart-shaped crayons.

Options

Don’t they look great? Okay, some are prettier than others. But I think they’re still pretty cool. And I get to keep some of them because there are more than enough for my classmates. In fact, each of my classmates will get three of them and I still have lots to keep (I’m lucky to be in class with fewer than 20 students.)

So, you know I wouldn’t show these to you and not tell you how Mommy and I made them, right? So, here it is.

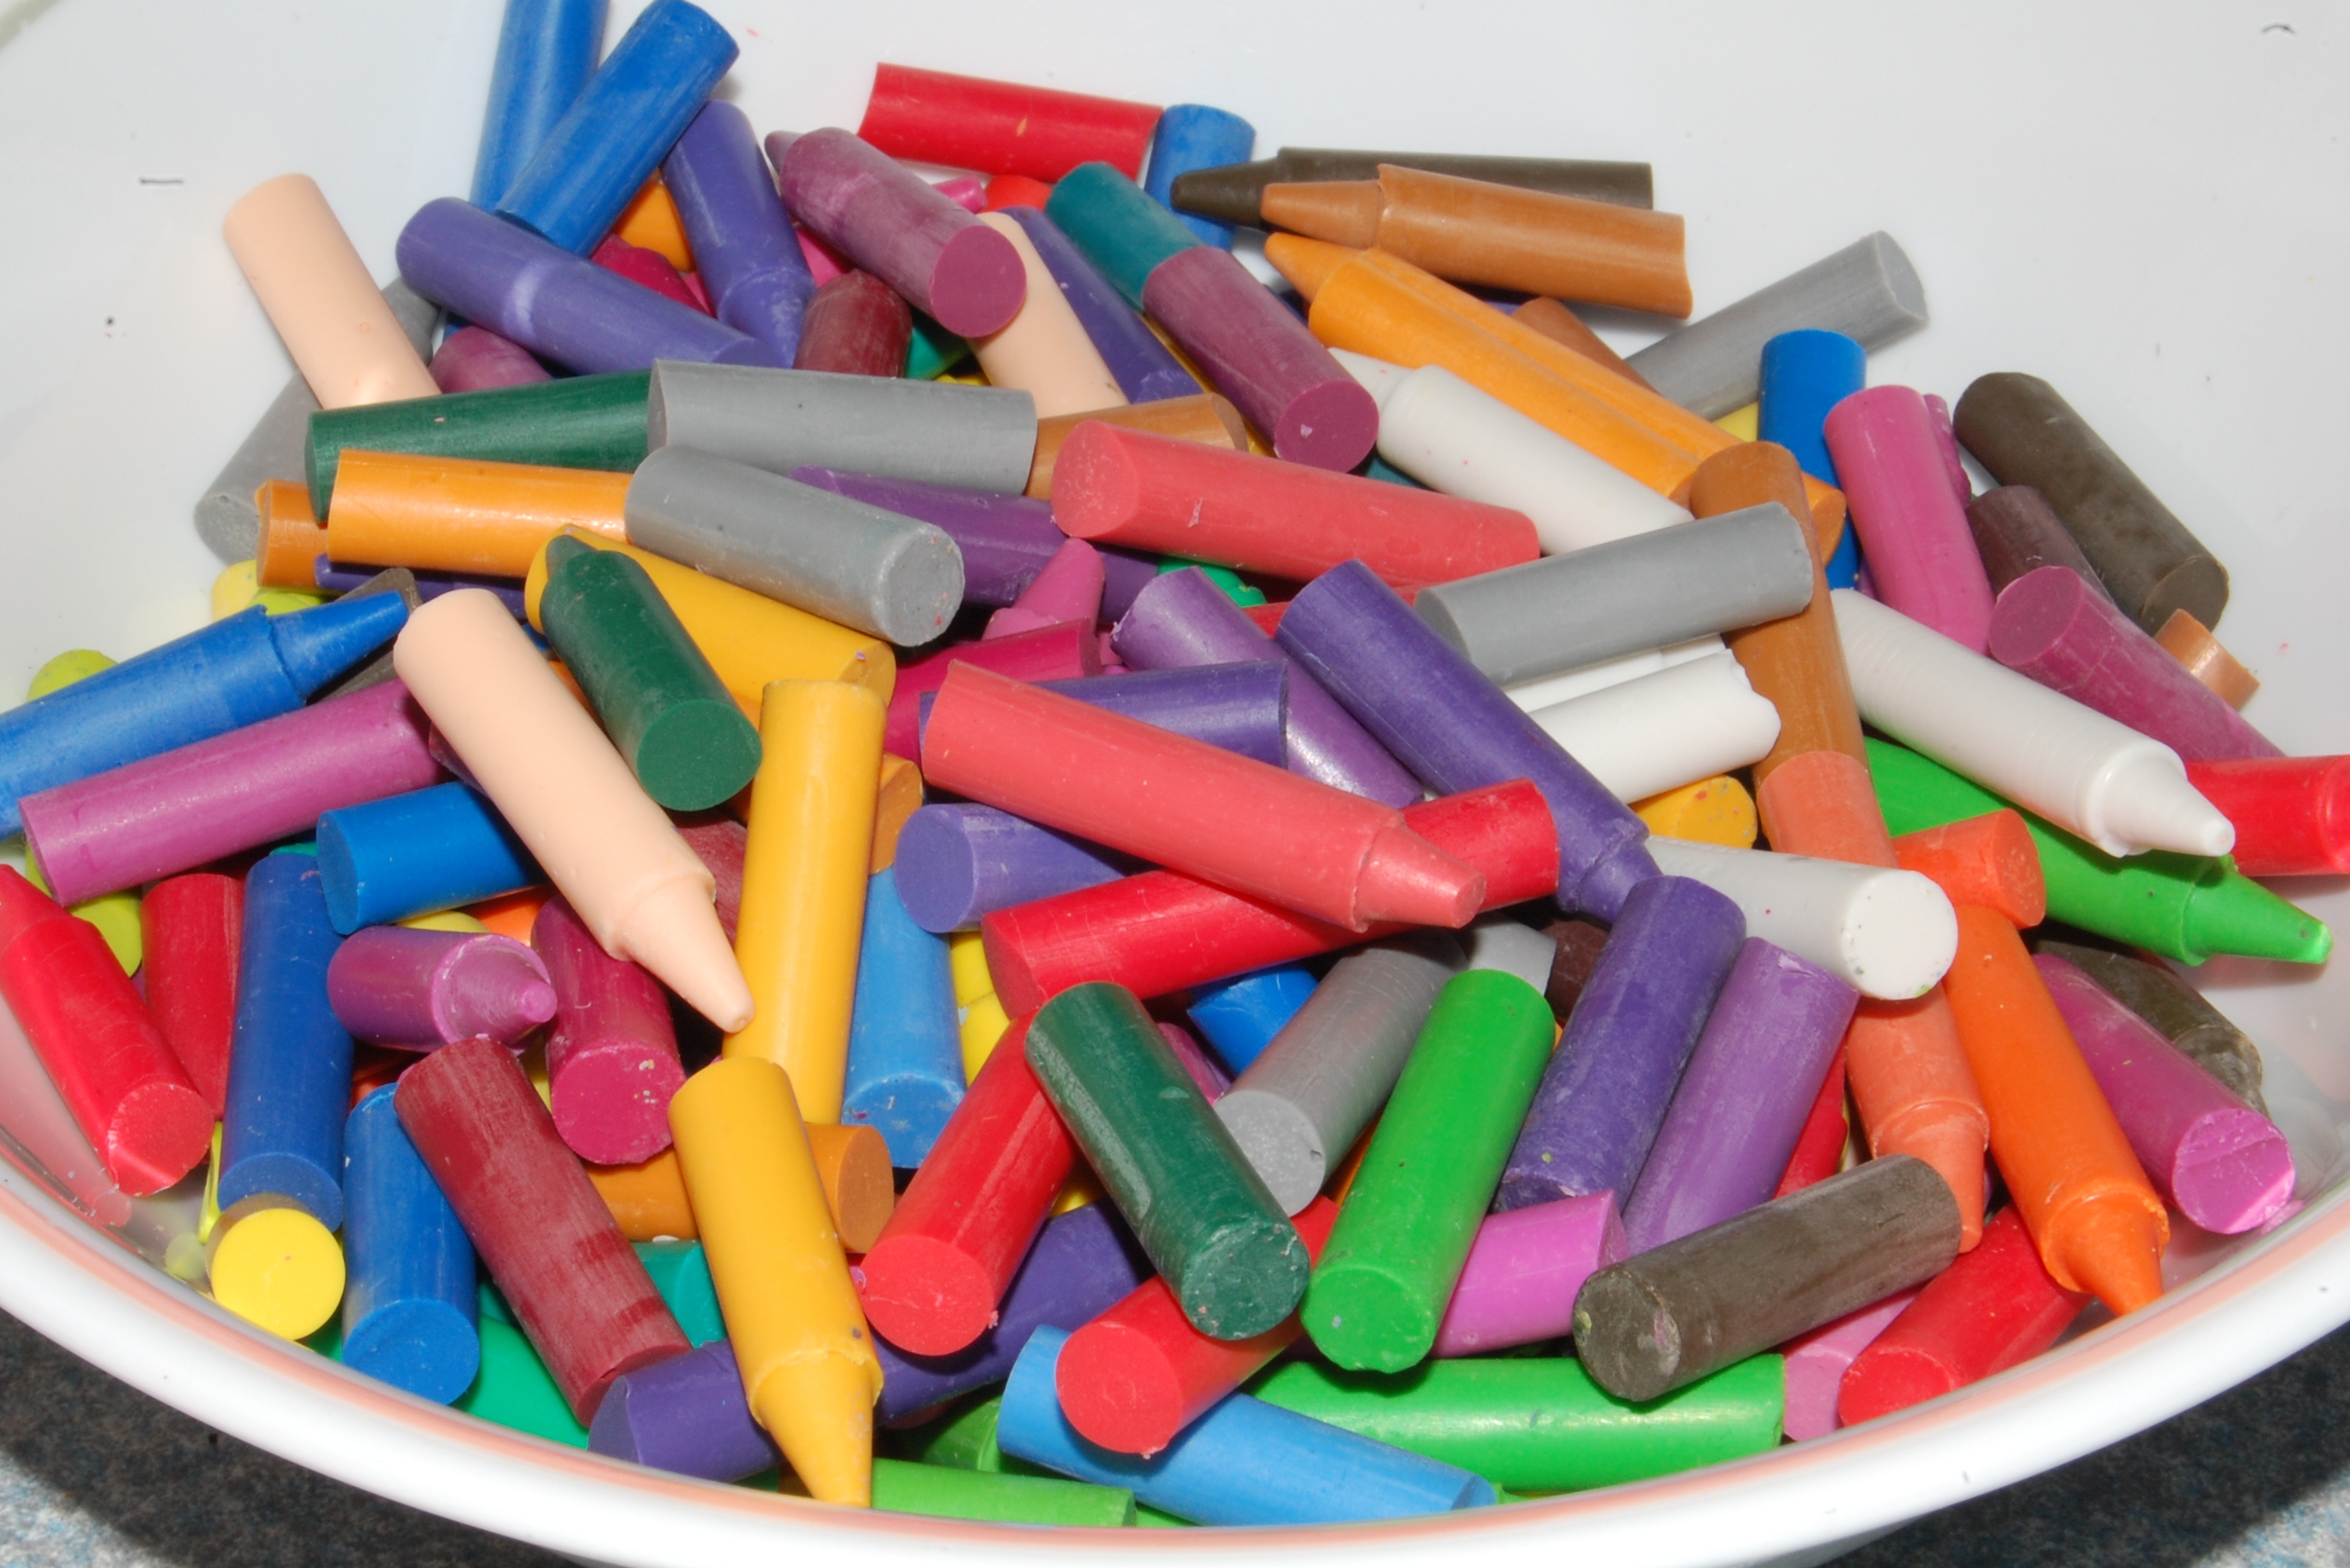
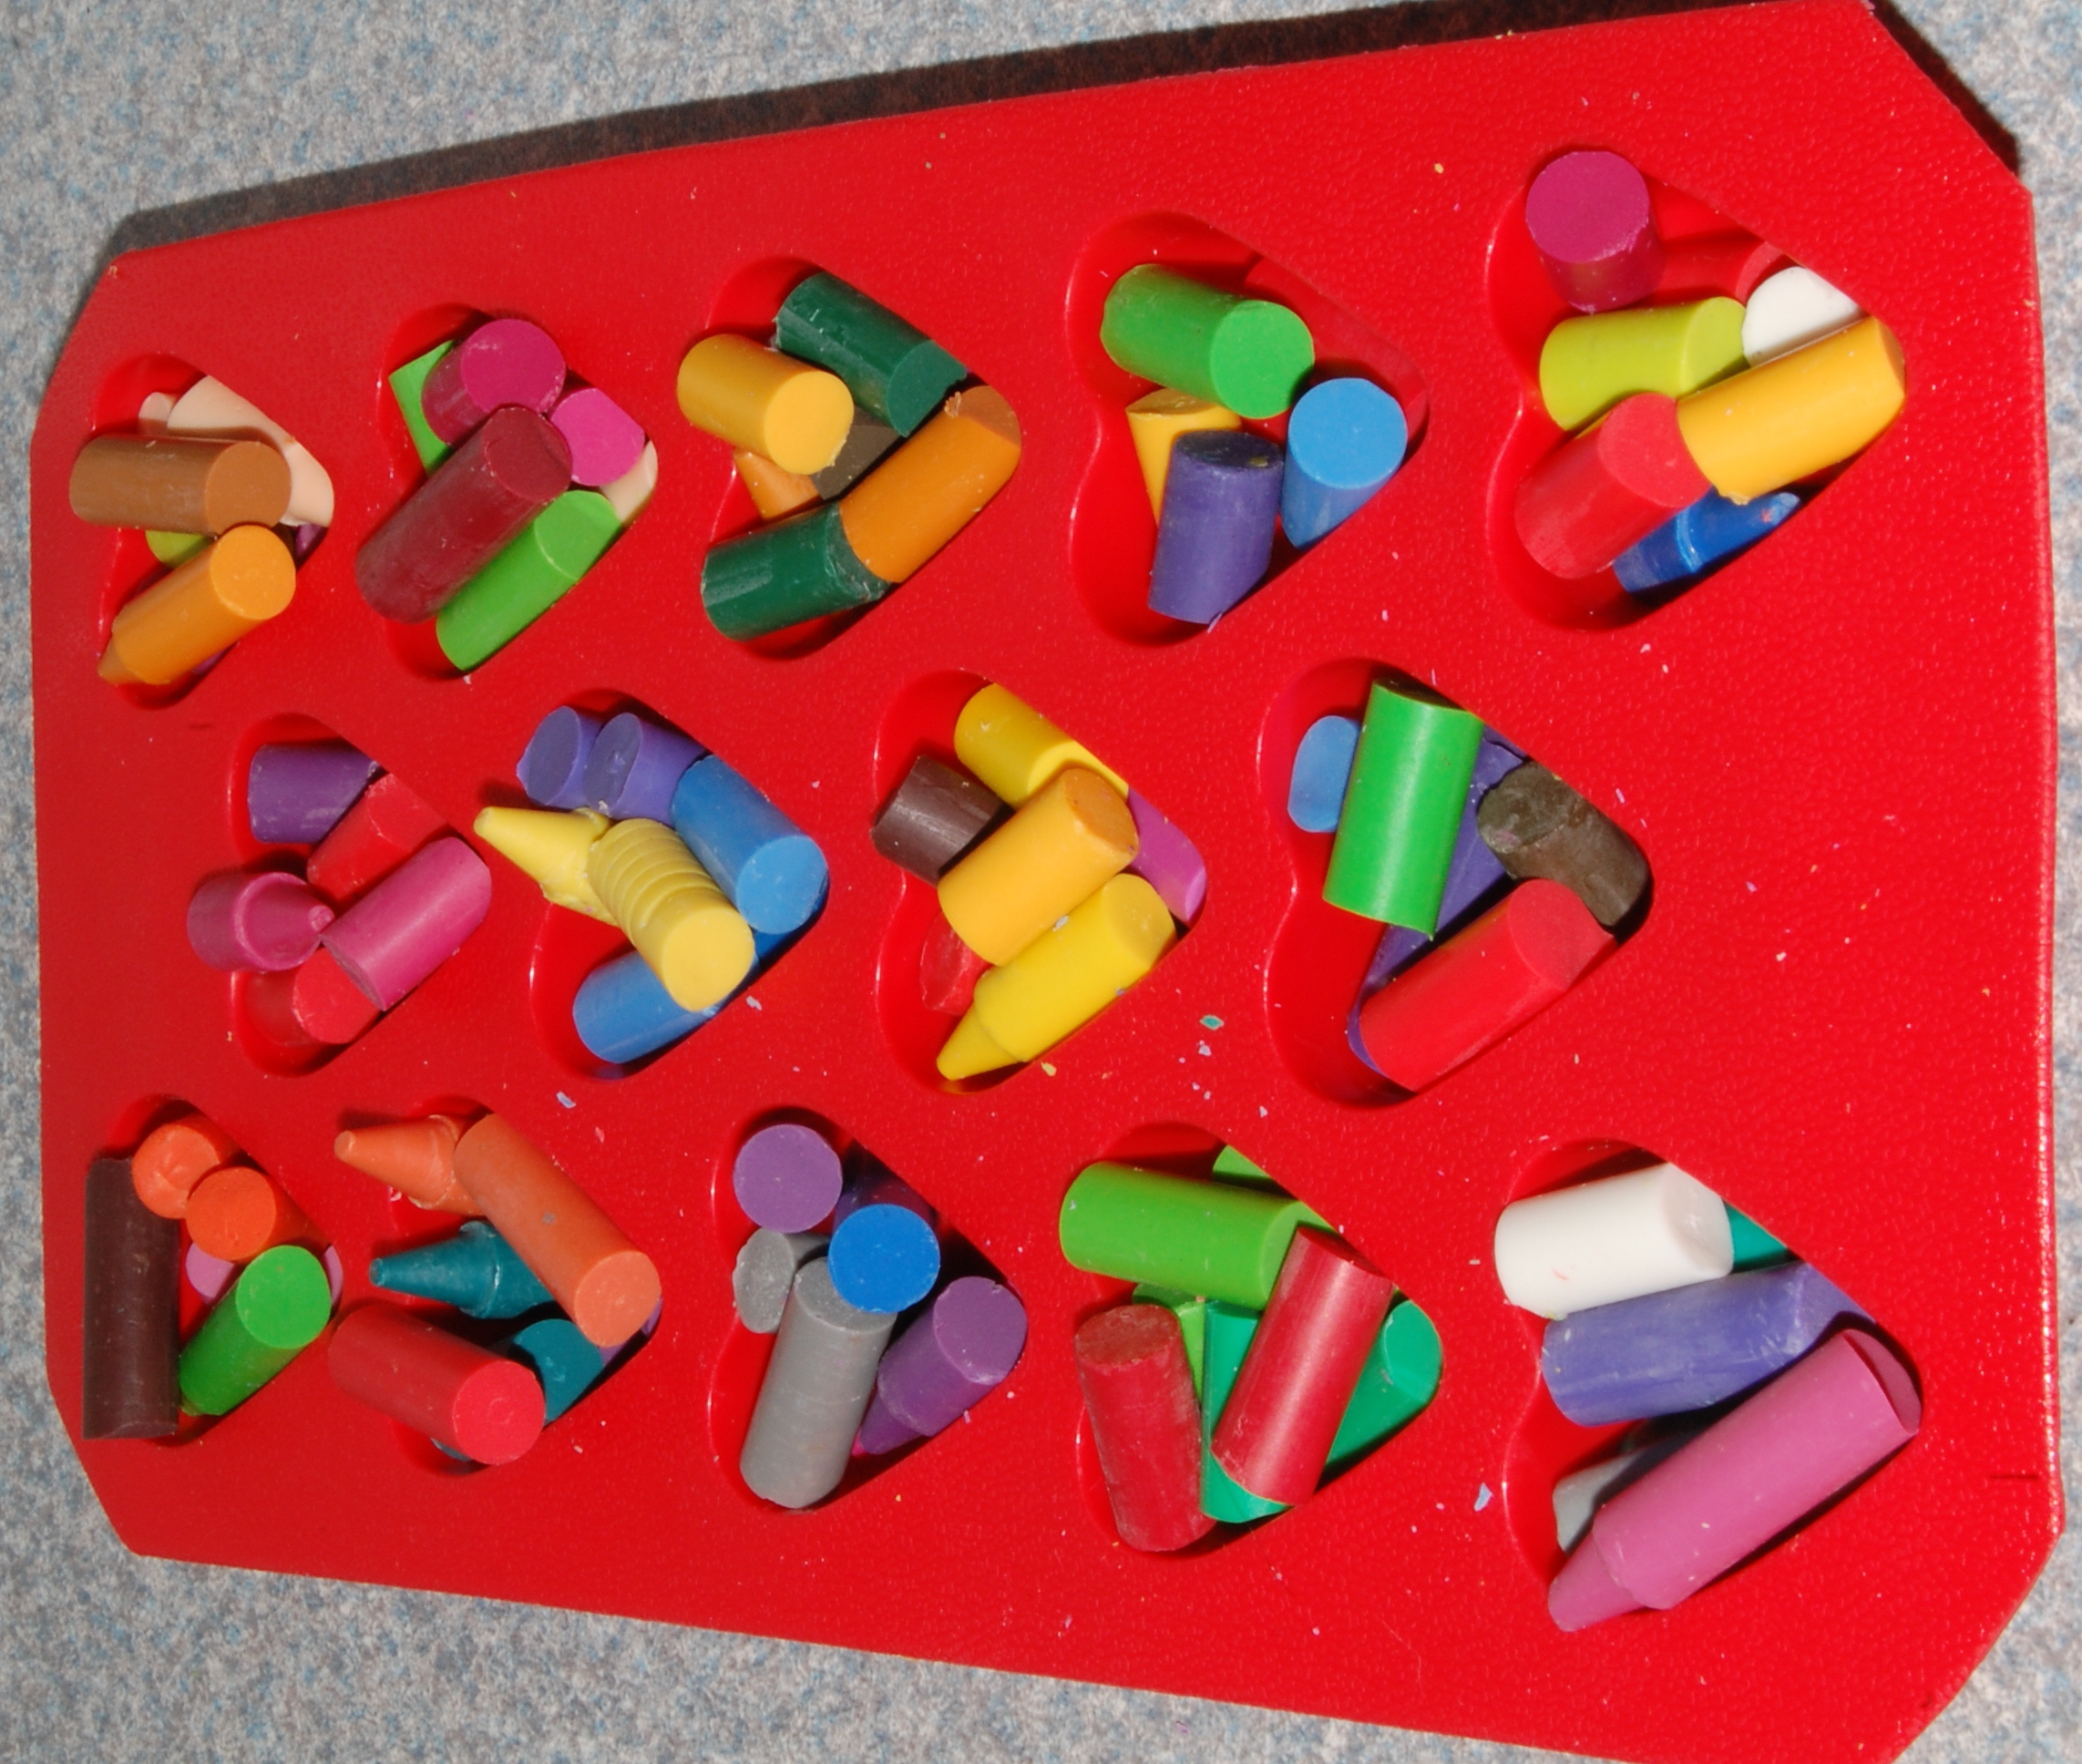
Mommy bought two big boxes of crayons at the dollar store. We took the paper off of them and broke them into small pieces.

Crayons

Mommy also bought an ice “cube” mold that is hearts instead of rectangles. It’s silicon, so it can go in the oven.

Heart Mold

Preheat the oven to about 250 degrees (Mommy says our oven is on the cool side, so we played with a little before we got these to melt, but if your oven is more accurate, 250 should do the trick.)

Fill the molds with small pieces of crayon. You can use all of the same color, different shades of the same color, or mix a few colors together. Just avoid black and dark browns because they tend to turn the whole thing into a dark blah.

First Batch

Put the mold on a cookie sheet (to catch any overflowing wax) and put in the oven. Now how long it takes will depend on how hot your oven is, how big your mold is (how many crayon pieces are in there,) how small your pieces of crayon are and (I think) the quality of the crayons (ours were cheap and took forever to melt!) I say keep your eye on them (at least the first batch, until you get the hang of it.) Like I said, ours took awhile – about 20 minutes. But once they start to melt, they turn to liquid quickly, so watch them.

Out of the Oven

Let them cool completely so they solidify again. Using a silicon mold makes them easy to pop out once they are solid. This is the first batch:

First Batch Done

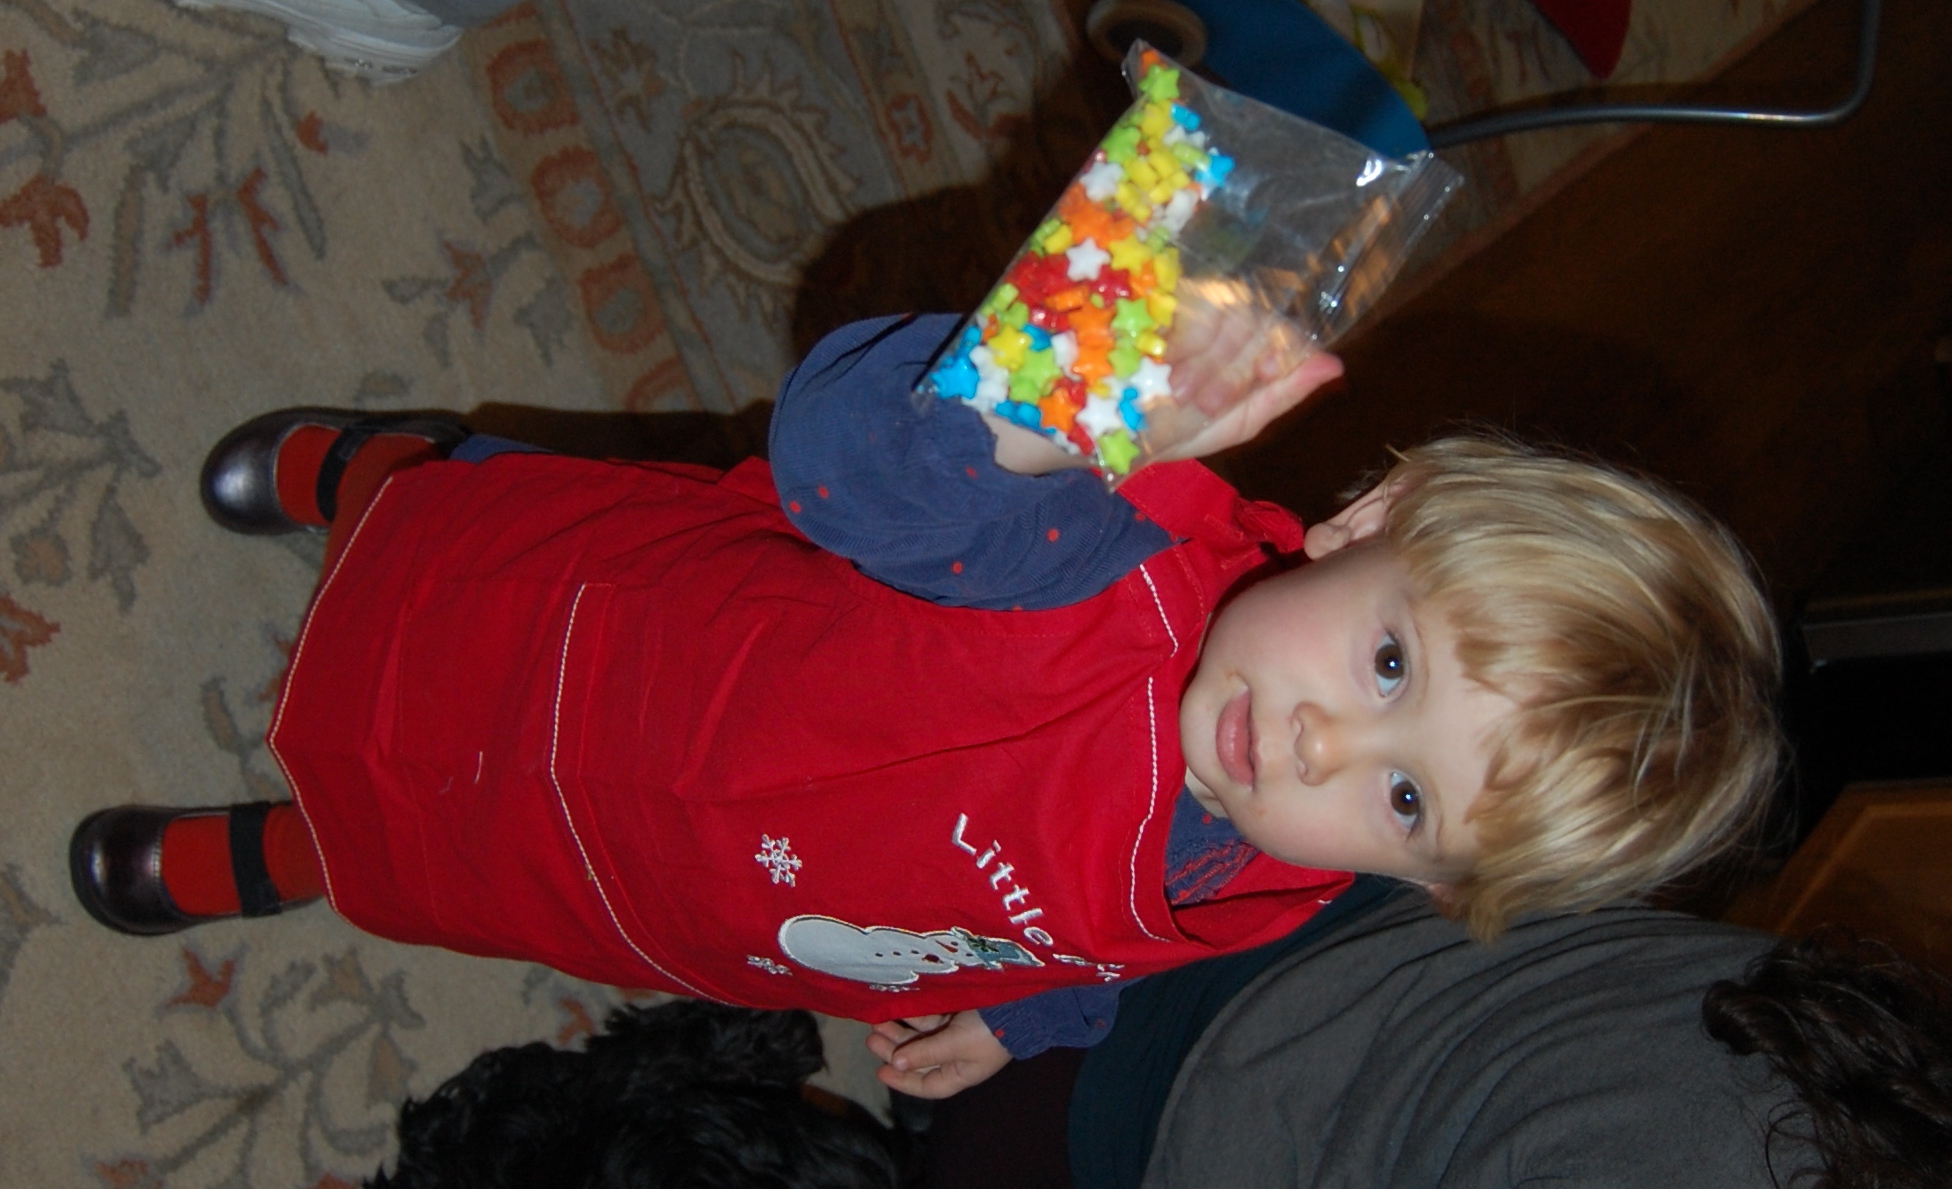
While we waited for the crayons to melt and re-solidify Mommy and I prepared the envelopes that we’d put the hearts in.Envelopes Ready

Then I got to pick which hearts I wanted to give each of my friends, we put them into the envelopes and sealed them with a sticker.

Stuffed and Sealed

Do you think my friends will like them? I sure hope so.


Oh, and since I’m a foodie, Mommy made one of my favorite meals after spending the day working hard melting wax!

Spaghetti and Meatballs

Will you be my Valentine?

Oatmeal Cookies with a Twist

It’s February and all the Christmas cookies are gone. Mommy has been packing one in my lunch each school day but now that they’re gone we needed more cookies in the house!

Mommy has told me when she was little there was always something for dessert in the house for her to take to school for lunch. And when she was old enough she was the one in charge of making it. She made lots of different things: cakes, cookies, brownies. Generally Mommy had a handful of recipes she used for these desserts – a brownie recipe from her first cookbook, boxed cake mix or the cookie recipe on the back of the yellow bag of chocolate chips.

Mommy has grown a bit braver in her baking ability since those days. She still makes the same brownie recipe and has promised me she will share the recipe when I am old enough to make them. But she has moved beyond boxed caked mixes and has tweaked the cookie recipe in a number of different ways. Today’s post is one of those new tweaks.

This recipe is inspired by a number of different sources: Alton Brown’s “The Chewy,” a good friends oatmeal-chocolate chip, and a cookie Mommy used have a local coffee shop called “The Everything” that has all sorts of ingredients thrown in. These ended up being oatmeal, chocolate chip, craisin cookies.

Cooling

Ingredients:

1 cup unsalted butter

1 1/2 cup flour

1 t salt

1 t baking soda

1/4 cup granulated sugar

1 cup brown sugar

1 egg, plus 1 egg yolk

1 1/2 t vanilla extract

3/4 cup oatmeal

1/4 cup milk

1 cup chocolate chips

1/2 cup craisins

Start by mixing the oatmeal and milk in a small bowl and allowing it to soak. Melt the butter in the microwave and set aside to cool slightly. Sift together the flour, salt and soda. We do this onto a paper towel so it easy to pour it into the mixer when the time comes.

Sifted Dry Ingredients

Pour the melted butter into a mixing bowl, add the sugars and beat together until well combined, about 2 minutes.

Butter and Sugar

Meanwhile, whisk the whole egg, egg yolk and vanilla together.

Beaten Egg

Pour the egg mixture into the butter and sugar mixture and mix thoroughly. Add the oatmeal and milk combination.

Oatmeal

Gradually mix in the dry ingredients. Stop a few times to scrape down the sides of the bowl.

Dry Ingredients Added

Add the chips and craisins.

Chocolate Chips and Cranberries

Mix thoroughly to combine. Chill the batter for about an hour.

All Mixed

We use an ice cream scoop to make the cookies. Six to a parchment or silpat lined cookie sheet.

Ready for Oven

Bake at 375 degrees for 7 minutes. Rotate the pan and bake another 7-8 minutes. Allow to cool for a few minutes before cramming into your mouth so you don’t burn yourself!

Cooling

Coconut Lime Chicken

Mommy really likes quick and easy meals. She also likes to use her slow-cooker. It makes life easy when Mommy can throw some ingredients in the pot, plug it in, turn it on, rush us off to school and have dinner waiting when we get home in the evening. This semester Mommy is teaching a late afternoon class, so she picks me up at school at about 5pm. Having dinner waiting for us when we get home is wonderful – especially when it’s cold outside.

If you are a regular reader of this blog, you know we like all sorts of different foods in this house. And Mommy and I like to experiment with different types of cuisine. Not too long ago Mommy found what looked like a yummy dish on Pinterest.  It combined some of our favorite flavors – coconut, lime, curry, spicy, sweet, citrus, yum! The recipe wasn’t for the slow-cooker, but Mommy thought it was worth a try. It worked out quite well. It was so tasty Daddy ate the leftovers in less than 24 hours after dinner!

Serve it with some steamed rice, cous cous, or our new favorite, quinoa, and it makes a perfect meal.

So here’s what we tried:

Ingredients

Into you slow cooker goes about 2 Tablespoons of olive oil. You could go without this probably, but the original recipe called for some oil, so we used a little here. Add the zest of one lime and then the juice too.

Oil and Zest

To this add the rest of the spices, adjust the amounts depending on your taste, these are amounts are approximate: 1 teaspoon cumin, 1 teaspoon chili powder, 2 teaspoons of curry powder, pinch of cayenne, salt and pepper to taste.

Spices

Then add the liquid: 2 Tablespoons soy sauce, 1/2 cup coconut milk, 2 Tablespoons Agave syrup (the original recipe called for sugar, you could substitute the sweetener of your choice.)
Then add the 2 boneless, skinless chicken breasts.

Sauces and Chicken

Turn you slow cooker on low and walk away. Leave it for 6-8 hours. About 15 minutes before you’ll serve it, add a bag of frozen peas and allow them to heat through.

Mommy made some cous cous the first time we had this. She made it with V-8 instead of water and that made it delicious and nutritious!

with Cous Cous

We owe special thanks to Grandma for asking for this recipe and getting me motivated to post it!

Gingerbread House Making

***Note*** This entry was supposed to have posted nearly a month ago. We’ve been having some technical difficulties here at Baltimore Foodie Baby. Hopefully things are all fixed now.***

Many families, especially those with kids, make gingerbread houses for Christmas. My Grandma has bought a kit for my cousin, Alayna, since Alayna was a little girl. This year, Grandma bought three kits: one for Alayna, one for her little brother, Logan, and one for me. We went to her house the weekend before Christmas and Grandma had everything set up for us to make our gingerbread houses.

The kits are made by Wilton; they make all sorts of baking supplies and you can find their products in many stores including Target, Michael’s, and Party City, to name a few. The kit comes with everything you need to build a complete house: pre-baked panels for walls and roof, royal icing that works as glue and a disposable piping bag, candy and red and green fondant for decorations. Grandma also made extra royal icing and bought extra candy for decorations. And when I say extra candy, I mean…

Candies

Seriously – extra candy!

I’ll admit it, I wanted to eat the candy more than I wanted to build and decorate the gingerbread houses. But Mommy helped and we got our house put together.

Decorated

You should know though that this is not a quick project. We didn’t really leave enough time to do it and the roof kept wanting to slide off. Eventually Mommy was able to hold it all in place long enough for the icing to dry a bit so it could stand by itself. My cousin Logan and Aunt Kristin didn’t have as much luck.

Many Hands

Decorating

Alayna, who has some previous experience was a real pro. She didn’t even bother trying to put the roof on until the rest of the house was assembled. She even decorated the roof before attaching it.

Thatched Roof

Alayna's

I neer saw Alayna’s finished product because none of the houses were dry enough for us to take home when it was time to leave.

So, here’s my review: This may be too-advanced a project for 2 year olds, but I suppose it’s never too early to start. Overall, these are fun to do and take out the time and energy it requires to make the gingerbread. Most people don’t eat gingerbread houses even when they make their own cookies, so using stale cookies isn’t a problem. They come with enough royal icing to hold the house together and do some decorating, but you might want to make more if your decorations are going to be elaborate. I didn’t try using the fondant, but Alayna used it for a door, a path, and a wreath. I think it was pretty easy to use. The kit comes with candy, but they weren’t really Christmas colors, so you might want to buy a little extra.

Canies come with kit

Allow lots of time to assemble and then lots more time for the house to dry before you try to move it.

Be sure to wear an apron because it can get pretty messy. But it was fun!

And eating candy is always fun, especially when Grandma buys lots!

Quality Control

Clam Chowder (New England Style)

We’ve had some very cold weather here in Baltimore the last few weeks. Well, very cold by Baltimore standards. We’ve even had some snow! Mommy says it’s not really worth mentioning because it hasn’t lasted more than a few hours, but for those of us who have only ever lived in Baltimore it still counts. The snow and cold yesterday put us all in the mood for soup and Mommy must have been reminded of growing up in New England because she decided to make chowder (or chow-dah, as I understand they call it…)

Finished Bowl

Mommy says there has long been some debate in her family about clam chowder. Nonno and Nonna (her parents) prefer Manhattan clam chowder. Perhaps because Nonno is from the NY-metropolitan area. However, although Manhattan is Mommy’s favorite city, she prefers the creaminess of New England clam chowder. Perhaps because she grew up in New England – though she doesn’t readily admit to this, so maybe it’s just the creaminess.

Whichever style you make, it’s a pretty simple process. In general, soups are fairly simple and don’t even have to take a long time. So, gather up some ingredients – many of which you may have in your pantry – and make yourself some warmth in a bowl.

Ingredients

Ingredients:

2 strips thick-cut bacon, diced

6-8 medium potatoes, diced

2 medium carrots, diced

3 stalks celery, diced

1 medium onion, diced

1 jar clam juice

1 (10 oz) can of clams

1 quart half & half (or a combination of milk and half & half)

salt & pepper

Instructions:

Render bacon over medium heat (this is just a fancy way of saying cook the bacon until all the fat has cooked away from the meat and you have crispy bacon and melted bacon fat.) Remove the bacon bits and drain them on a paper towel for garnish later. Add vegetables to the pot and toss them with the bacon fat.

Potatoes and Carrots

Open the can(s) of clams and drain the liquid into the pot of vegetables. Also add the jar of clam juice. Add water to the pot to just cover the vegetables.

Celery and Broth

Bring to a boil and then turn down heat to simmer until the potatoes and carrots are tender, about 15-20 minutes. Add clams and warm through (clams will get rubbery if they are over-cooked.)

Clams added

Add the half & half (we used fat-free, though Mommy doesn’t understand how half & half can be fat-free… and it was still creamy) and salt and pepper to taste. We use lots of pepper because Mommy likes pepper. You will probably also use more salt than you think you want or need, but add a little and taste – you can always add more, but can’t take it away. The salt is a funny one to judge in this recipe because the clam juice is salty, but potatoes can absorb a lot of salt without tasting salty. You decide what you like.

Cream Added

It’s ready to eat. We topped ours with the bacon bits (which you could also stir in at the end) and some oyster crackers, which may be my new favorite. A little parsley or some chives would be good too, especially for a little color.

If you really wanted to make this Manhattan style, just omit the half & half and add an equivalent amount of tomatoes and their juice and Voila!

Now wasn’t that easy?!?!

Finished Bowl

Split Pea Soup

It’s been pretty chilly here in Baltimore lately (or course today, when I finally get around to posting this, it’s supposed to over 60 degrees.) I even wear a jacket to school in the morning these days.

When it starts to get cool, Mommy likes to make soup. She has a few favorites – sweet potato & leek, mushroom, roasted tomato… But this week she wanted something hardy so she decided to give split pea a try. We had a packet of soup mix that just needed water and ham added to it, but it only made two servings, so Mommy made it from scratch. It was really pretty easy. And, other than being a little salty, it was really tasty.

Mommy also made some delicious rye bread to go with our soup. She cheated a little on this one and used Bob’s Red Mill rye bread mix. It was delicious though – maybe even my favorite part, but I’m partial to carbohydrates!

Soup is really pretty easy to make and I bet you have the ingredients for some kind of soup right in your pantry right now. For this one, we started by sweating one onion, diced.

Then we added two carrots, diced.

To that we added lots of freshly ground black pepper, salt (to taste – we probably added too much not thinking about the amount of salt the ham hocks would add,) and a couple of bay leaves – be sure to fish these out at the end, they make soup yummy but aren’t good to eat.

Then we added two cans of chicken stock (about 28 oz total) and one cup of split peas (rinsed.) We added the peas after the stock and they sank to bottom, so you can’t see them in the picture, but they’re in there (you can see the green just under the surface of the stock.) Finally, we had two ham hocks in the freezer and we put them in the pot. Split pea soup usually has some ham in it. If you don’t have hocks, you can chop up a ham steak or a piece of thick cut deli ham. If you’re a vegetarian, you can omit the ham and use vegetable stock instead of chicken stock. You can also make your own stock, but that’s another posting.

Here’s the best part… now you just turn the stove down to medium-low, cover the pot and let it cook. It should simmer for at least an hour, but letting it go all day won’t do any harm. Just before serving,i f you used ham hocks, like we did, take them out and cut any meat off them and return it to the pot. Serve piping hot with some yummy bread – something whole wheat or rye or pumpernickel would be best with this soup.

Enjoy! And stay warm.

Split Pea Soup

1 cup dried split peas, rinsed and drained

1 medium onion, diced

2 carrots, diced

salt and pepper, to taste

2 bay leaves

28-32 oz of chicken stock (or vegetable stock, or even water) – less stock means a thicker soup

2 ham hocks (or 1/2 cup diced ham)

Frankenstorm Cookies

Sorry this post is delayed in arriving to you. We were having some technical difficulties (funny enough, they weren’t related to the storm mentioned herein.)

So, last week it was known as Frankenstorm. Now it is being called “Super Storm Sandy.” Either way, Mommy and I had to make cookies for my Halloween party at school, so we took advantage of being stuck at home and baked. We were very lucky here in Baltimore. The storm was not as bad as it could have been. Mommy lived in Baltimore when Hurricane Isabel came right up the Chesapeake Bay in 2003. She says Sandy didn’t impact us as much as Isabel did. We are counting our blessings and are very sad about NYC and the Jersey Shore though. Those are both places we visit at least once every year. We go to NYC the weekend before Christmas every year to celebrate with my Uncle David and Aunt Lindsey who come down from New Hampshire. And we spend a week at the Jersey Shore every summer. We have lots of friends and family that are still without power and some who are homebound because of the damage caused by the super storm. Hopefully the thought of these cookies will bring a small smile to your face, no matter the damage in your area.

Mommy had a great plan. In preschool we are learning to recognize our written names, so she was going to make big cookies, one for each of my classmates, with each student’s name on it. Best laid plans, as she often says… One of my classmates has a wheat allergy. That means baked items need to be gluten-free. Unfortunately, sugar cookies need gluten to be rolled out, so she was concerned her idea wasn’t going to work after all. But she did a little research and learned there are some companies that make gluten-free sugar cookie mix. This would save needing to buy a variety of different flours and xantham gum. It didn’t solve the problem of rolling them out though. Mommy decided to buy a mix anyway and give it a try. She was going to make regular sugar cookies too and just be sure to keep the two recipes completely separate.

While mixing up the gluten-free dough, Mommy came up with an idea that she wanted to be sure I shared with you because it is a way of getting cut out cookies from gluten-free dough. She spread the dough in one, thin layer on a baking sheet covered with parchment paper (we used tin foil, but parchment would probably be better.) After baking as directed (they took a little longer than the package said because it was one big cookie) she let them cool slightly before using the cookie cutters to cut the already baked cookies. Then she pulled away the excess cookie and was left with the shapes she wanted. Just beware: gluten-free cookies are more likely to break because the texture is more crumbly than regular sugar cookies.

The regular cookies were easy after the glutton free ones. Here’s our recipe:

3/4 cup butter, softened

1 cup granulated sugar

2 eggs

1 tsp vanilla

2 1/2 cups flour

1 tsp powder

1/2 tsp salt

Using an electric mixer, cream together butter and sugar until fluffy.

Add eggs and vanilla and mix thoroughly.

Mix the dry ingredients together in a separate bowl and then add the slowly (otherwise flour will go flying everywhere!)

Scrape together all the dough onto a piece of plastic wrap and create a disc.

Refrigerate the dough for at leat two hours. And wait…

Once the dough has chilled, preheat the oven to 400 degrees. Using about 1/6 of the dough, roll it out on a well-floured surface to about 1/4 inch thick

Using the cookie cutters of your choice, cut cookies and place on a cookie sheet (ours were lined with silpat, but parchment paper would work well too.)

Bake 6-8 minutes until they just begin to turn golden around the edges. Watch them carefully at the end because they will go from golden to burnt very quickly.

Move cookies to a cooling rack. Allow them to cool completely and then decorate however you like. I had lots of fun decorating mine.

Enjoy!

Tomato Sauce

It’s a pretty miserable day here in Baltimore. If you haven’t heard, there is a big hurricane headed our way and the rain and wind has already begun. Mommy and I thought, while we still have power and Internet, we would share one of our summer food activities with you. We’re also going to spend some time cooking and baking over the next day or two because school is already closed through Tuesday for both of us, so there will be more blogs soon (as long as we don’t lose power, of course.)

You may remember that Mommy and I spent a few days this summer going to pick-your-own farms and then canning. We made blueberry jam, raspberry jam, chocolate-raspberry sauce, apple sauce, apple butter, apple-fig compote and tomato sauce. I case you missed the title of this post, this is all about tomato sauce.

Tomato sauce is not really difficult to make, but it can be time-consuming. There are a few things you can do to make things go faster, but you really want to let your sauce thicken in its own time.

We started with lots of tomatoes. We picked just over 22 pounds. Wash them in cold water.

We peeled the tomatoes because the skin can get pretty tough and it curls up into little tubes that are not too tasty. This is easy to do and a step I wouldn’t skip. Fill a large pot with water and bring to a boil. Score each tomato with an “X” n the bottom (opposite the stem.)

Place scored tomatoes into boiling water, about four or five at a time. After about 30 seconds, the skin will start to peel away from the flesh. Remove them from the boiling water and place them in an ice water bath (this is not necessary to stop any cooking, but will help cool them more quickly so they are more easily handled.) Once cool enough to handle, you can easily peel away the skin with your fingers.

Chop the tomatoes into chunks – this doesn’t have to be anything fancy. The smaller the chunks, the faster your sauce will cook. You can also remove the seeds at this point, if you want. We didn’t, but some people think the seeds make the sauce bitter. Another way to speed up the process is to remove some of the juice/water from the tomatoes during this step.

Once your tomatoes are all prepped, dice a large onion and sweat it in about two Tablespoons of olive oil in the bottom of a large stock pot.

Once the onion becomes translucent, add minced garlic to taste ( we used a few cloves – remember, it’s a lot of tomatoes!) Now it’s time to add all those tomato chunks and any juice that has accumulated on your cutting board (unless you wanted to remove some of this liquid.) Add about a tablespoon of salt. This may seem like a lot, but it’s a lot of tomatoes and tomato sauce, like bread, will taste “flat” without enough salt.

(Sorry, Mommy got distracted at this point and stopped taking pictures.)

Now you wait. Turn the heat down because tomatoes have a lot of sugar that can burn easily. For this reason, you want to stir occasionally too. But really, there’s just lots of waiting. The flesh of the tomatoes will gradually break down and the sauce will thicken. Ours reduced by almost half over almost 12 hours of cooking. As it is approaching the consistency you want, taste it. You may need to add more salt. But save this until you are almost done because the flavors will concentrate as the sauce thickens and you can’t take the salt out once it’s in! You can also add your herbs of choice here. We didn’t add any because each jar may go to different uses needed different herbs. We’ll add them when we use the sauce. We did add about a tablespoon of lemon juice – it “wakes up” the flavor a bit.

I won’t repeat the information on canning here. However, when you turn 22 pounds of tomatoes into sauce, you’re probably going to want to can most of it unless you’re feeding a very large family in the next couple weeks. You could also freeze it if you’re not interested in canning. This should be enough sauce to get you through until tomato season next summer. As long as we ration it a bit.

Sunday Dinner – Roast Chicken

It has begun to cool off here in Baltimore and while we still have a few 70-degree days ahead of us there is also a nip in the air some days, especially in the morning. Mommy took advantage of this and made a real Sunday dinner this weekend. She also took advantage of some of the yummy items we can still find at our local farmer’s market.

Like so many of the other things Mommy makes, there’s no real recipe here – add what you like.

Mommy started with cutting some fall veggies into chunks and putting them into the bottom of a large baking dish. You could also use a roasting pan for this. We had gone to the farmer’s market earlier in the week and found some patty pan squash and Japanese eggplant as well as some fingerling potatoes. She cut the first two into chunks, but left the potatoes whole because they were already small. I also like roasted carrots and beets, so Mommy added some of those too. She peeled both and cut them into chunks as well. Then, for some flavor, she added about 5 cloves of garlic, just smashed and peeled and two onions cut into wedges. Then she added about 2 tablespoons of olive oil and some salt and pepper (to taste) and tossed it all together.

It looked so pretty.

Mommy used those pretty veggies as a bed for a roasting chicken. Make sure your chicken is fully thawed. And then she ducked outside and picked a few sprigs of fresh herbs – we still have some thyme and rosemary. Mommy just scattered them over and around the chicken. She also added some salt and pepper to the chicken and about a tablespoon of butter, broken up with her fingers, to the chicken.

Place in a 425-degree oven for about an hour. It is done when a thermometer placed in the thickest part of the thigh (careful not to hit bone) registers 165 degrees and/or the juices run clear. Don’t rely on the plastic pop-up thing that comes in the chicken, they’re not always reliable.

Mommy doesn’t really slice the chicken into thin slices. Carving a bird is really not a pretty thing. She pulls off the drumsticks and the wings and cuts the breast meat off and slices it into chucks. Doesn’t make any difference to me; it still tastes yummy.

Vacation

I’m sorry I’ve been absent for a bit. I had hoped I would get on a schedule this summer that had me posting a blog about once a week, but the best laid plans and all…

This past week I was on vacation with Mommy and Daddy and Nonna and Nonno (formerly Granma and Granpa, we’re changing things up a bit.) We went to Ocean City, NJ. It’s an annual event and this year I had so much fun.

I don’t know if I’ve mentioned this before, but I love the water and I love to swim. When we arrived last Saturday I wasn’t entirely sure about the ocean but it took only a short time for me to warm up and I wanted to run right in.

I also loved playing in the sand, but was more interested in knocking down sand castles than building them. When I was first born one of Daddy’s friends thought he said Godzilla instead of Graziella (or maybe it was auto-correct) and everyone laughed about that. This week at the beach I liked the idea of being Godzilla – crushing Tokyo then New York!

Of course, we ate, A LOT. We bring food so we don’t eat out every night, but we eat out a few times too. I can’t share any of our yummy meals with you though because we just were too hungry to think about taking pictures! We did eat out one night at Spadafora’s, which was tasty. For those who know, the name of that restaurant is very similar to Mommy, Nonna and Nonno’s name, so we had to go there. That was the night Aunt Maryanne came down for a night to visit. I had shrimp and Cape May Scallops and clams on the half shell. Yum!

The last night we were there we had a homemade repeat of that dinner out and everyone, including me, said it was even better. I don’t have pictures, but I can tell you we wrapped corn in foil and put it on the grill; tossed little neck clams on the grill (just wash the shells and throw them on, when they pop open they’re done, squeeze on a little fresh lemon and dip in some butter); then put some foil down on the grill and tossed on the shrimp and scallops, a couple pats of butter and one lemon, sliced on top, seasoned with a little salt and pepper and closed the grill until the shrimp turned pink and the scallops were opaque. Yup, they were all good.

We also spent time at the Boardwalk – of course. On our last night at the Boardwalk, I went on my first Carousel and we had frozen custard. We were going to have waffles and ice cream, but the stand’s waffle machine wasn’t working. Oh well, custard is good too.

Before:

Image

After:

And few good ones from the beach:

I can’t believe I almost forgot my corn dog!